Welcome to the world of NECCO!

News, crafts, recipes and more from the New England Confectionery Company (NECCO).


Leave a comment

Sweethearts Series: Candy Initials

IMG_0468

Valentine’s Day season is in full swing, and we couldn’t be having more fun! Our delicious Sweethearts Candies are keeping our taste buds happy and also are inspiring our minds to really get creative with them! Today, we have yet another fun Valentine’s Day DIY made using our classic candy that will add a little bit of sweetness to your day! We believe it’s not Valentine’s Day unless there’s a little bit of love everywhere you go, and this adorable Sweethearts Candy Initial is just that perfect touch of love to sweeten your work space, especially if you’re dreading the terrible winter weather outdoors!

Enjoy the fun DIY & be sure to check in again for more Sweethearts Series ideas!

Supplies Needed: 

  • Cardboard / card stock
  • Pink construction paper
  • Squeeze Glue Bottle or Glue Stick
  • Ruler
  • Scissors
  • Pencils
  • Sweethearts!

SHhair4

Instructions:

1. Use a ruler to outline your Initial on thick cardboard or card stock.

2. Prior to cutting out your letter, lay out your Sweethearts on the outlined initial. This will help you see if you need to adjust the size of the letter to properly and securely fit your candies. (Tip: We took a picture of the proposed layout of the Sweethearts to reference later when we were gluing them down!)

IMG_0459


3. Cut out your letter, and then use it as a stencil to trace out the initial on the construction paper as well. You will then need to cut out the construction paper letter.

4. Evenly spread the glue across the cardboard letter. (Tip: we used a scrap piece of the card stock as an edge to make sure the glue was spread across the entire letter in an even, smooth layer.) Take the construction paper cut out letter, and slowly place it onto the cardboard letter.

5. Firmly press these two layers together, ensuring all edges are secured tightly. Let dry completely.

6. Once dry, layout your Sweethearts on the letter, and then gently glue them on, one by one. Press down firmly on each heart to ensure they adhere properly.

IMG_0469

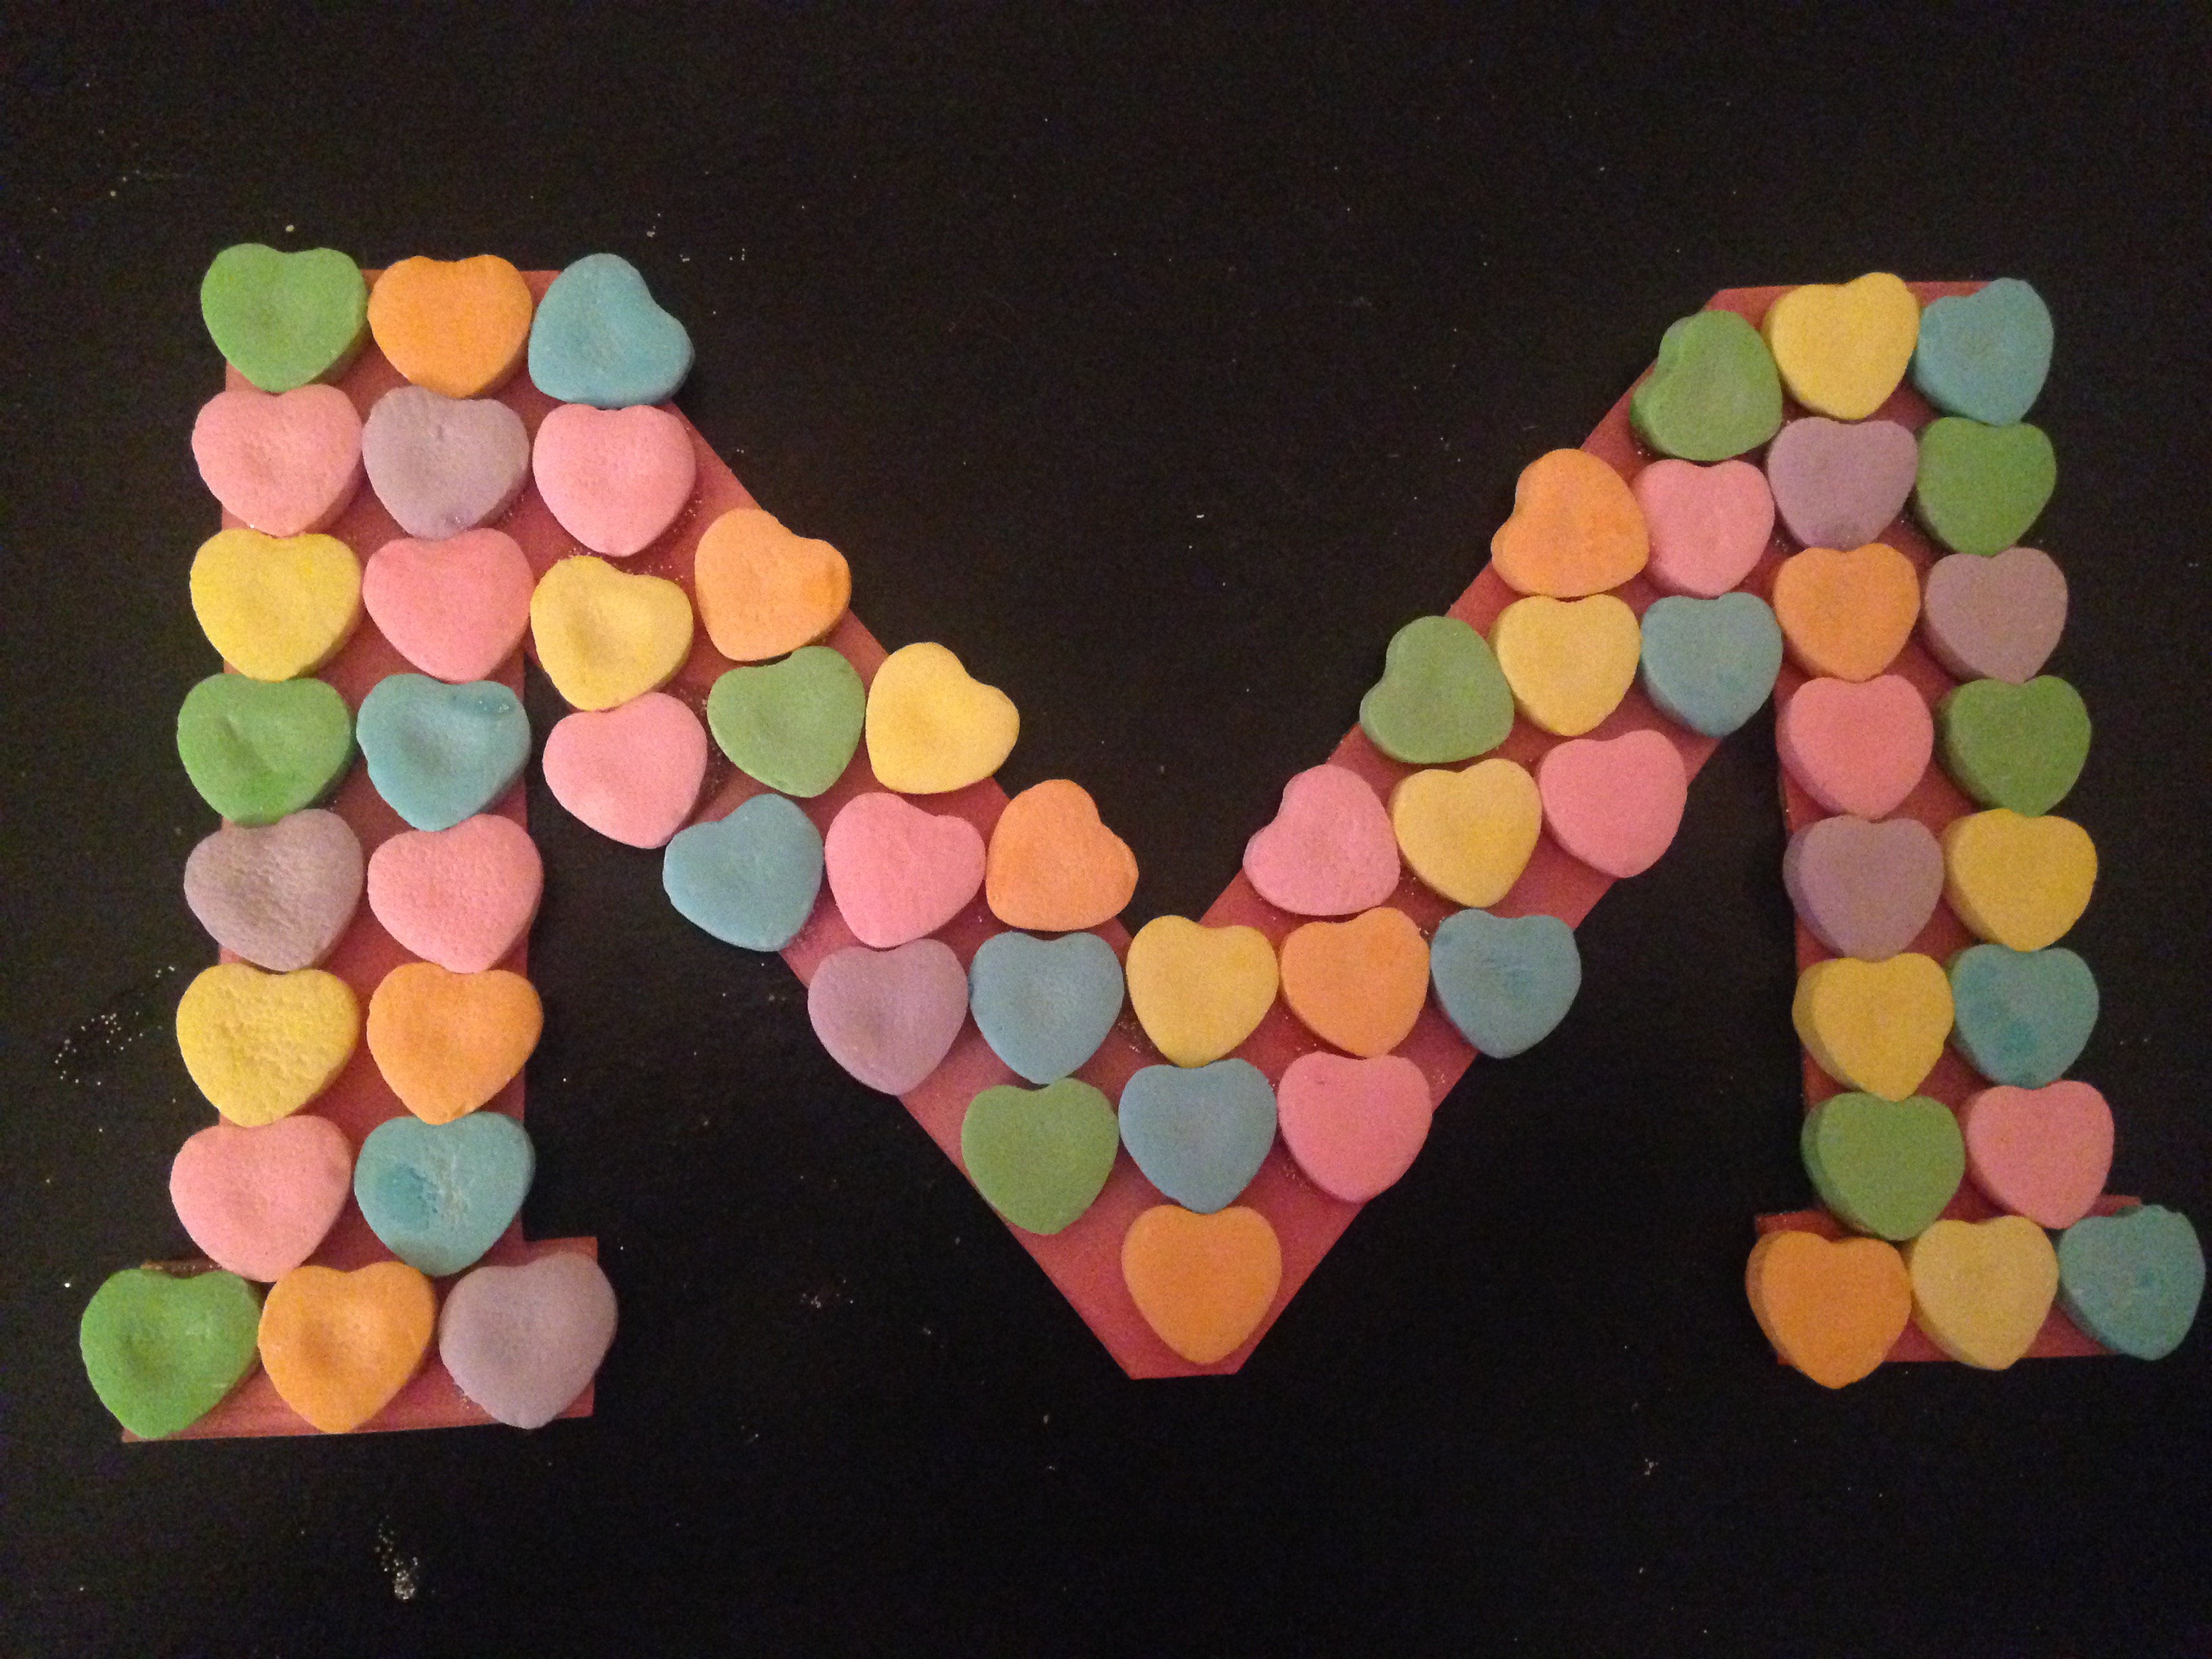
7. Let dry completely, so when you prop it up, no Sweethearts fall off the paper. Once dry, you have the delightful task now to decide where you want to display your sweet creation! Enjoy!


Leave a comment

Sweethearts Series: Cupcake Creation!

SH-Cupcake2


After Wednesday’s Sweethearts Series post, our sweet tooth really kicked into high gear! Today, we bring you another yummy treat that will satisfy your  taste buds and also be the perfect addition to any Valentine’s Day celebration: funfetti cupcakes! This flavor really reflects the fun you have spending times with loved ones and is the perfect mix to complement our multiple flavors of Sweethearts. To decorate these cupcakes, we love picking Sweethearts that have our favorite messages on them and placing them on top for each special guest. These delicious Cupcake Creations make for a delicious personal treat that you’ll want to make over and over again!

Ingredients & Baking Supplies:

  • 1 & ½ cups flour
  • 1 cup sugar
  • 1 & ½ tsp baking powder
  • 8 Tbsp butter, unsalted & softened
  • ¼ cup whole milk
  • 1 egg
  • 2 egg whites
  • 1 & ¼ tsp vanilla extract
  • ¼ tsp salt
  • sprinkles/jimmies
  • vanilla frosting of your choice
  • kitchen or hand mixer
  • medium and large mixing bowls
  • measuring spoons
  • frosting spatula
  • whisk
  • cupcake liners
  • Sweethearts

SHhair4

Instructions:

  1. Pre-heat oven to 350°F or slightly warmer to 375°F depending on the size and strength of your oven.
  2. Line your cupcake tray with cupcake liners.
  3. In the medium mixing bowl, gently whisk together the flour, baking powder, and salt. Set aside.
  4. In the large mixing bowl, use a kitchen or hand mixer to blend together the sugar and the butter. The speed best used is medium-high, and it should be beat until the mixture is completely blended and has a fluffier texture to it. You want to blend until there are no clumps.
  5. Add the egg and egg whites, one at a time, into the large mixing bowl, and again using the mixer, beat until the eggs are completely blended into the butter/sugar mixture.
  6. Once this is completely combined, blend in the vanilla extract until completely combined. Thoroughly mix to avoid clumps of ingredients.
  7. Once ready, gradually stir in the dry mixture from the medium mixing bowl and the milk in increments to the mix. On a low speed, use the mixer to blend until ingredients are just combined.
  8. Add the sprinkles/jimmies into the mixed batter and carefully, using either your hands or a frosting spatula, work them evenly throughout the mix.
  9. Pour the mix into the lined cupcake tray 2/3 of the way full in each liner. This will give the cupcakes room to expand without overflowing when they bake.
  10. Bake for approximately 18 minutes. You do not want to over-bake here. The best way to tell that your cupcakes are ready is to use a tooth pick to poke into the cupcake. When it comes out clean without cupcake batter on it, they are ready. Tipit’s sometimes helpful to rotate the cupcake tray halfway through baking to ensure complete baking coverage.
  11. Remove the cupcakes from the oven and move the tray to either a wire cooling rack or a cooled counter top in order for them to cool completely; allow several minutes for them to cool. Note: It is very important to wait this out. Attempting to frost warm cupcakes will tear up the top of the cupcake.
  12. Once cooled, use either a frosting spatula or a frosting pastry bag, to frost the cupcake. We added some colored sugar sprinkles on top for show.
  13. Decorate your frosted cupcakes with Sweethearts featuring your favorite sayings, and then it’s time to share and enjoy!


1 Comment

Sweethearts Series: Crisped Rice Bites!

SH_krispies


Valentine’s Day is such a wonderful time of year, and we’ve been having so much fun celebrating it with our Sweethearts Series!

Over the years, we have seen so many amazing, unique Sweethearts creations that our wonderful fans have created that have inspired us to get really innovative with how we craft and bake with Sweethearts. Today, we switch from a DIY tutorial to a quick and easy yummy recipe that’s perfect for a lunch bag snack for your little one or any Valentine’s Day celebration. It combines a classic beloved dessert: crisped rice treats with our classic beloved candy: Sweethearts – talk about a “can’t beat it” combo!

Enjoy today’s delicious anytime recipe, and be on the lookout for some more Sweethearts fun tomorrow!

Ingredients & Supplies:

  • 4 Tbsp butter
  • 10 oz marshmallows
  • 6 cups crisped rice cereal
  • cupcake tray
  • white chocolate
  • kitchen mallet
  • zipped plastic sandwich bag
  • Sweethearts

SHhair4

Instructions:

  1. Melt butter in a medium saucepan over low heat, adding in marshmallows until completely melted. Remove from heat and stir in crisped rice cereal until well mixed.
  2. While still warm, press the prepared mix into each of the spaces in the cupcake tray. (Tip: spraying the tray with cooking spray first prevents sticking!) Allow to cool completely in the tray.
  3. Place the Sweethearts in a zipped plastic bag, and crush them with a small kitchen mallet.
  4. While mixture is cooling, melt the white chocolate in the microwave for 15-30 seconds to prevent burning.
  5. Remove the cooled bites from the cupcake tray then dip them first into the melted white chocolate then the crushed Sweethearts – maybe even add a full one or two Sweethearts for show on top!
  6. Let cool for an hour, then enjoy!


Leave a comment

Sweethearts Series: Valentine’s Day Candy Necklace!

SH_necklace

Second day of Sweethearts Series, and this treat is one of our favorites! It’s very simple to make but is sure to be a hit with the kids!

Candy can create some of the sweetest memories during your childhood, and you always remember your favorite sweets and the happy feelings you had with them when you were growing up. Some of the most fun was had with the novel items, like candy necklaces, that kept you laughing endlessly with how unique, and sometimes silly, they were. Today, we hope to capture some of that sweet, sweet childhood fun with our very own Valentine’s Day Candy Necklace!

So, grab these few supplies, and get ready for you and your little one to share some laughs as you enjoy this delicious treat!

Supplies:

  • White String (Be sure that this is food safe & OK to touch your candies!)
  • White Chocolate Chips
  • Microwave-safe Plate
  • Sweethearts

SHhair4

Instructions:

  1. Place a Sweetheart onto a microwave safe plate, making sure the text is facing down towards the place. Place one of the white chocolate chips centered on the Sweetheart and microwave this for about 15-30 seconds to soften the chocolate.
  2. Take a piece of food-safe string, and press it down on the melted piece of chocolate.
  3. Take a second Sweetheart with the text facing up, and place it on top of the chocolate and string. Press together firmly yet delicately.
  4. Repeat this as many times as you’d like on the string.
  5. Prior to placing it on your neck, let cool at least one hour for chocolate to set. Enjoy!


Leave a comment

Sweethearts Series: Valentine’s Day Hair Clip!

SHhair2

Valentine’s Day is definitely our favorite time of the year. It’s a time filled with love and special sweet surprises for all of the important people in your life! Our beloved longtime classic candy, Sweethearts, is a staple for this season. Fans love to eat and share these little sweets with the cute sayings on them; they also love using them in holiday recipes, crafts and decorations.

In celebration of this, we will be having a Sweethearts Series up until Valentine’s Day filled with our favorite recipes, crafts, decorations and more. Many ideas are inspired by our amazing Sweethearts and NECCO fans! Stay tuned here on our World of NECCO Blog for all of the fun!

Today, we have a quick Valentine’s Day hair clip DIY. It’s the perfect accessory for your little Sweethearts fan to wear to school or to play with friends! [And who says you can’t wear one yourself! 😉 ] With very few supplies and a couple of minutes, you’ll be on your way to starting your Valentine’s Day celebration with Sweethearts! Enjoy & be sure to check in again tomorrow!

Supplies Needed: 

  • Metal Hair Clip
  • Squeeze Glue Bottle or Crazy Glue
  • Glitter Glue
  • Sweethearts!

SHhair4


Instructions:

1. Clean your hair clip to make sure there’s no dust or dirt. This will help the glue and Sweethearts adhere better to the clip.

SHhair5


2. Take your squeeze glue bottle or crazy glue and spread a thin line along each edge of the hair clip. Then, line up four Sweethearts (or more if you have a bigger clip) and press each one firmly yet delicately onto the clip.

SHhair3

3. Pressing firmly helps to set the glue properly. Allow it to dry completely. Once dry and Sweethearts are secure to the clip, take the glitter glue and squirt a small dollop onto each of the Sweethearts. Using either your finger or a small paintbrush, evenly spread the glitter glue all over the exposed portions of the Sweetheart.

SHhair2


Allow the clip to dry completely so that it is not tacky in any way; this will help avoid any hair getting stuck accidentally! Once dried, clip it in your little one’s hair and get ready for a very sweet day! Enjoy! =)