Welcome to the world of NECCO!

News, crafts, recipes and more from the New England Confectionery Company (NECCO).


Leave a comment

PRU BOO

On Sunday, NECCO attended The Shops at Prudential Center‘s PRU BOO. Families filled The Prudential Center, many fully dressed in costume, for a fun-filled day of trick-or-treating, holiday crafts and loads of Halloween excitement!

Children could trick-or-treat from store to store, stocking up on irresistible NECCO Sweets. All of the proceeds raised from trick-or-treat bag sales went directly to benefit the Room to Grow charity, an organization whose mission is to enrich the lives of children born into poverty during their first three years of development.

NECCO was proud to participate in such a positive community event alongside many other wonderful local organizations. Zipcar Boston was also a big part of PRU BOO. One of their Fiats were on display. An artist even took some of our NECCO candies (NECCO Wafers, Mary Janes and Candy Buttons) and decorated the tiny car! Talk about a SWEET ride! 😉

We were very excited to not only provide candy for the little ones but to also participate in some of the crafting fun! We had a booth set up at the Food Court to greet the little princesses, super heroes, critters, and all of the other costumed cuties running around the Pru.

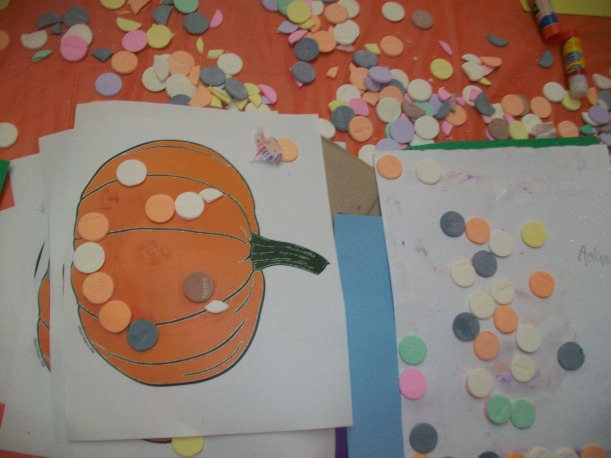
Guests were invited to take some of our spare NECCO Wafers and glue them onto colorful construction paper or onto a pumpkin template. The result was hours full of smiles, laughs and some amazingly creative designs! [Oh, and a little bit of a mess too… but that’s how you know you had a great time, right? 😉 ]

One of our little friends made this beautiful, colorful creation! She took her time to perfectly place each NECCO Wafer until she created her masterpiece!

We even had a happy pumpkin made for us! Now just look at that Jack-o-Lantern smile!

A few ghosts made appearances as well!

And one of favorite creations was this amazing NECCO Wafer bat! It was an awesome display of creativity from an amazing young artist!

In the end, PRU BOO was a major success. It was an honor to not only be a part of a day filled with Halloween fun but also connect with our community in the Boston area. We cannot wait to continue this in the future!


Leave a comment

Eerie eyeball cupcakes!

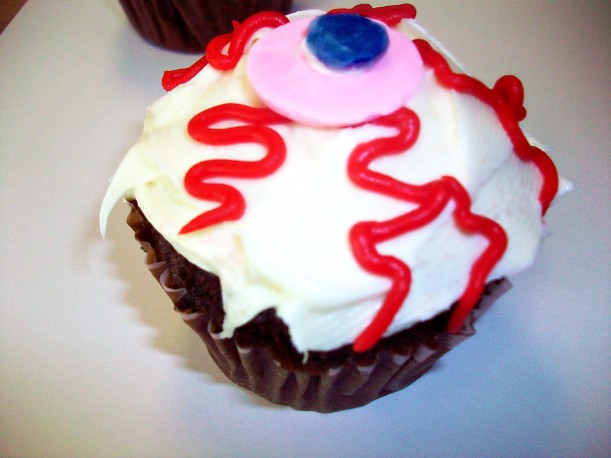
If you’re looking for a fun holiday recipe that will both freak out your family and friends and also make their taste buds scream with joy, try whipping up a batch of these Eerie Eyeball Cupcakes – made using assorted NECCO Wafers! Get into the holiday spirit and enjoy gnawing on a perfectly creepy Halloween treat that is sure to cause a delicious scare!

Ingredients:

For the cupcakes:

  • 2 cups of all-purpose flour
  • 2 cups of sugar
  • ½ cup of cocoa powder
  • 2 teaspoons of baking soda
  • 1 tsp of baking powder
  • ½ tsp of salt
  • 1 cup of vegetable oil
  • 2 large whole eggs
  • 2 cups of butter milk
  • 2 teaspoons vanilla

For the frosting and decorations:

* You can definitely use pre-made frosting here! These are the ingredients if you choose to make a creamy frosting.

  • 5 Tbsp of unsalted, softened butter
  • 2 tsp of vanilla extract
  • 2 & ½ cups of powdered sugar
  • 8 oz. of softened cream cheese
  • tube of pre-made thin red icing
  • optional: chocolate chips
  • 1 roll of assorted NECCO Wafers

Baking Supplies:

  • cupcake liner cups
  • metal cupcake baking tray
  • 1 large and 1 medium mixing bowl
  • mixer (stand or hand)
  • measuring cup
  • ½ tsp , 1 tsp, and 1 Tbsp measuring spoons
  • whisk
  • large spoon
  • frosting pastry bag
  • small frosting spatula
  • toothpick

Instructions:

  1. Pre-heat oven to 350°F or slightly warmer to 375°F depending on the size and strength of your oven.
  2. In the medium mixing bowl using the whisk, combine the flour, baking powder, baking soda, cocoa powder and salt.
  3. In the large mixing bowl, use the mixer to beat together the sugar, eggs, oil, buttermilk and vanilla.
  4. Once the mix in the large mixing bowl is completely blended, slowly pour in the combined dry mix from the medium mixing bowl.
  5. Using the mixer, blend this mixture until completely combined.
  6. Line the cupcake trays with the cupcake liner cups.
  7. Fill each cupcake liner cup about 2/3 full using the large spoon. It’s best to take this step very slowly so as not to overflow the liners or cause a mess from the dripping spoon.
  8. Bake for approximately 20 minutes. You do not want to overbake here. The best way to tell that your cupcakes are ready is to use a tooth pick to poke into the cupcake. When it comes out clean without cupcake batter on it, they are ready.
  9. Remove the cupcakes from the oven and move the tray to either a wire cooling rack or a cooled counter top in order for them to cool completely.  It is often best to leave these overnight to cool. Note: It is very important to wait this out. Attempting to frost warm cupcakes will tear up the top of the cupcake.
  10. While the cupcakes cool, you can also choose to make your own frosting. Using the mixer, blend together the vanilla, butter and cream cheese.
  11. Once these are completely blended, slowly add in the powdered sugar. If you do this gradually, it will make for easier mixing.
  12. Blend until completely combined and smooth.
  13. Fill the frosting pastry bag with your frosting.
  14. Once cupcakes have cooled completely (often it’s best to wait until the next morning to ensure they’ve set) use the frosting pastry bag to frost the cupcakes with ample frosting. You want the entire top to be covered.
  15. Use the frosting spatula to smooth your frosting into the desired shape and finish.
  16. Using the red icing tube draw squiggly lines down from the center to the edge of the cupcake top. These will be your creepy eye veins! Have fun here doing whatever design you desire!
  17. Place a NECCO Wafer at the center point where all your squiggly red veins meet. This will be your eye color.
  18. Lastly, either using chocolate chips or you can break a licorice (black) NECCO Wafer into a creepy shape for your pupils. Dip the pupil into some of the leftover frosting and it will stick to the NECCO Wafer eye color.
  19. Indulge on your Eerie Eyeball Cupcakes!! =)


Leave a comment

Spooky Black Cat Brownies!

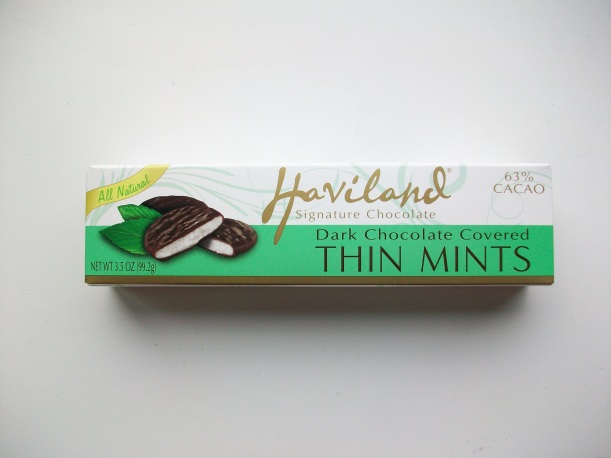
During Halloween season, we always see black cats pop up around more than usual. This time, they’ll even pop up right on your dessert table! We’re bringing you a fun Halloween recipe that’s simple to make, and one that your children will love to decorate! For a rich chocolate, minty taste bud explosion, give these Haviland Thin Mints Spooky Black Cat Brownies a try!

Ingredients:

  • 1 & Ÿcups of sugar
  •  ½ cup of unsalted butter
  • 1 cup of all-purpose flour
  • 1/3 cup of unsweetened cocoa powder
  • ½ tsp of baking powder
  • ½ tsp of salt
  • 1 & ½ cups of bittersweet chocolate chips
  • 3 large whole eggs
  • 1 tsp vanilla extract
  • white or vanilla frosting
  • red icing pen
  • extra chocolate chips
  • 2 boxes of Haviland Thin Mints

Baking Supplies:

  • mixer
  • parchment paper
  • 8×8 square baking pan
  • 1 large mixing bowl
  • 1 medium sauce pan
  • mixer (stand or hand)
  • measuring cup
  • 1/4 tsp, 1/2 tsp , 1 tsp, and 1Tbsp measuring spoons
  • whisk
  • large spoon
  • small frosting spatula
  • small amount of butter for pan greasing
  • plate

Instructions:

  1. Begin by pre-heating the oven for 350°F or slightly warmer to 375°F depending on the size and strength of your oven.
  2. Set the sauce pan on the stove over medium heat.
  3. In the sauce pan, add in the sugar, butter. With the large spoon, stir these ingredients occasionally until they are melted.
  4. Add the bittersweet chocolate chips to the sauce pan. Stir ingredients frequently until completely smooth.
  5. Remove the sauce pan from the heat and set aside to cool for 10 minutes.
  6. In the large mixing bowl, add in the flour, cocoa powder, baking powder and salt.
  7. Using the whisk, stir this dry mix until all ingredients are completely combined.
  8. Once the saucepan mixture has cooled off following the 10 minutes, pour this into the dry ingredients mix.
  9. Using the mixer blend these ingredients together until completely combined.
  10. Add in the 3 large whole eggs and then the vanilla extract.
  11. Again use the mixer to blend all ingredients until combined and smooth.
  12. Using the greasing butter, lighly butter the baking pan, and then line it with a layer of parchment paper. Be sure to leave a 1-2 inch overhang on each of the sides of the pan.
  13. Pour the cooled, completely combined mix from the large mixing bowl into the pan.
  14. In a grid-like format, place 16 Haviland Thin Mints into the batter. You can push them down slightly.
  15. Using the frosting spatula, cover the Haviland Thin Mints completely with the brownie batter.
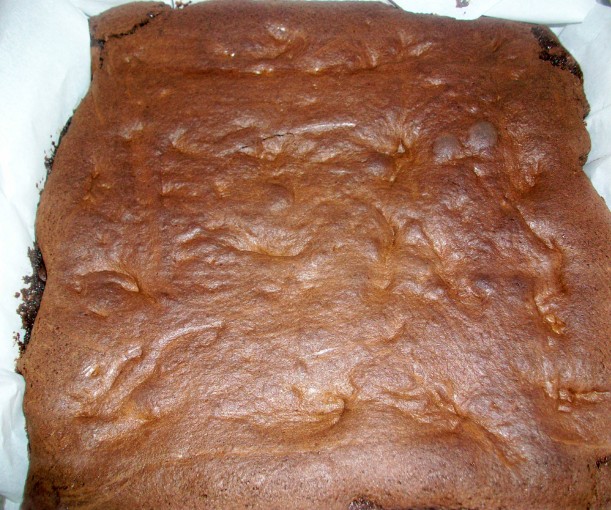
  16. Place pan into the pre-heated oven and  bake until the brownies are somewhat puffed and slightly set. Depending on the strength of your oven, this is usually around 30-35 minutes.
  17. Remove from oven onto a cooling rack for 30 minutes. Note: this step is very important. You need the brownies to be warm, not hot in order to place the Haviland Thin Mints on top. If the brownies are too hot, they will melt!
  18. Take 16 more Haviland Thin Mints and place them in the same grid-like format you insert the previous 16.
  19. Let these cool for approximately another 20 minutes.
  20. Decorate the Haviland Thin Mints on top of the brownies as faces using frosting drops and the extra chocolate chips (whole or chopped) as eyes, the red icing as the mouth and whiskers, and whole chocolate chips for the ears.
  21. Set this completed and decorated brownie pan into the refrigerator for 5-10 minutes to make sure all of the chocolate is completely set before cutting.
  22. Once the time has passed, remove from the refrigerator. Grab the pieces of the parchment paper that over hang and lift the brownie mix from the pan onto a plate.
  23. Cut brownie mix into 16 even squares.
  24. Indulge. =)


Leave a comment

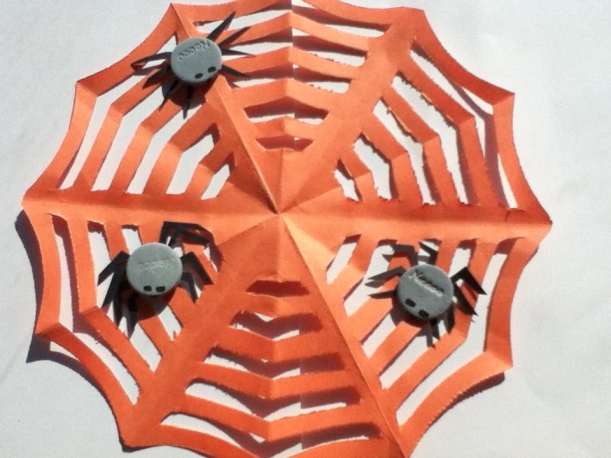
NECCO Wafer Spider Web

We hope you’re not afraid of spiders! Here’s yet another awesome NECCO Wafer Halloween decoration that will be so much fun to add to your celebration! With a few easy steps with barely any supplies, you’ll be on your way to a truly creepy creation that will be sure to freak out some of your guests! =)

Supplies Needed:

  • construction paper – any color you’d desire your web to be
  • black construction paper – for the spider legs
  • scissors
  • tape
  • glue stick
  • black permanent marker
  • NECCO Wafers – licorice (black) or other flavors depending on what color spiders you’d desire! =)

Instructions:

Take a piece of construction paper of any color you’d like and fold over one corner diagonally so that it lines up perfectly with the side. You will have about 2.5″ of excess at the bottom. Note: be sure to create a hard, crisp crease. It will help later during the cutting stage.

Cut off the excess.

Fold this triangle in half, splitting the right angle in half. Create another hard, crisp crease along this fold as well.

Turn the paper so that the top point seen above is pointing downward. Fold the right half section inward and then follow it by folding the left half section over the right section. Again create sharp creases as it will help later with cutting. Note: this is the most difficult step and make take a few tries to fold evenly into 3 sections.

Cut straight across at the top, removing the two exposed folded corners at the top. This will result in a triangle.

Cut the top edge of this triangle in a groove like manner. This will create the spikey outer edges of your spider web.

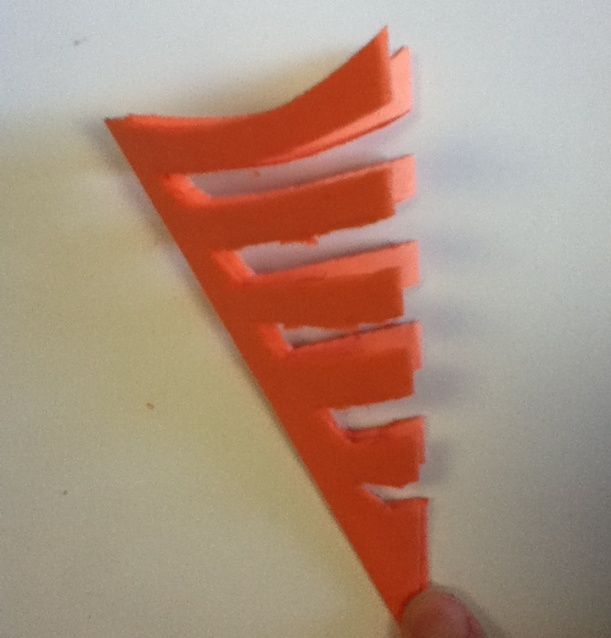
Cutting ONLY FROM THE RIGHT SIDE (this is important), cut strips using an every other pattern. Cut to the left, leaving enough paper that will allow for the spider web’s seams. You can cut as many as strips out as you’d like!

Slowly begin to unfold it. If folded and cut correctly, you will see seams like this indicating that you did not cut any of the grooves completely off.

Unfold the web carefully so not to tear it. You can leave it under a heavy object for a short period of time to flatten it out more completely.

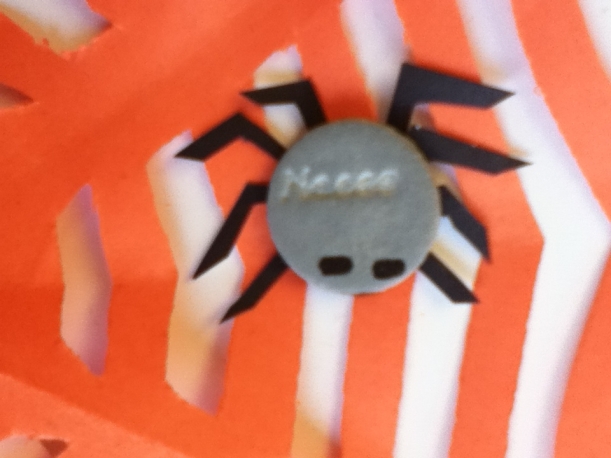
To make the spiders, simply take licorice (black) NECCO Wafers and using a black permanent marker draw two dots for the eyes. Then using black construction paper cut out 8 legs of varying bends and lengths. You can then glue or tape these to the back side of the NECCO Wafer. Tape these completed spiders onto the web, and you are finished!

Enjoy your spooky gathering! =)


Leave a comment

Halloween Coupon!

Halloween is just around the corner! That means it’s time to start stocking up on the sweets for the little trick or treaters [and yourself 😉 ], and we want to help make that easier for you! =)

Today in many newspapers across the nation and also online on our Facebook – we revealed a Halloween coupon!! It’s to save $1 off any 2 NECCO Halloween candy bags 9 oz. or larger! So head to your local retailer where you normally get your NECCO sweets and enjoy a great deal that is simply irresistible.

You can Like us on Facebook HERE where you’ll find the online version of the coupon or search for your local newspaper in the list below. Enjoy some scary, sweet savings!!

Newspaper Listing:

Connecticut

  • Hartford Courant
  • Manchester Journal Inquirer
  • Hartford HC Sunday Select
  • Meriden Record-Journal
  • New Britain Herald Press
  • Torrington Register Citizen
  • Willimantic Chronicle
  • Middletown Press

Massachusetts

  • Boston Globe
  • Boston Herald
  • Quincy Patriot Ledger
  • Lowell Sun
  • Hyannis Cape Cod Times
  • North Andover Sunday Eagle Tribune
  • Framingham Milford MetroWest
  • Brockton Enterprise
  • Lynn Daily Item

New Hampshire

  • Manchester New Hampshire SundayNews
  • Nashua Telegraph
  • Concord Monitor
  • Dover Sunday Citizen
  • Portsmouth Seacoast Sunday
  • Keene Sentinel
  • Laconia Citizen

Maryland

  • Baltimore Sun
  • Baltimore Sun Plus
  • Annapolis Capital Gazette
  • Westminster Carroll County Times
  • Carroll County Times Sunday

Pennsylvania

  • Greater Philadelphia Newspaper
  • Philadelphia Tribune
  • Chester Delaware County Times
  • Pottstown Mercury
  • West Chester Local News
  • Lansdale Reporter
  • Norristown Times Herald

Colorado

  • Denver Post
  • Denver Post – Sunday Select
  • Boulder Daily Camera
  • Longmong Daily Times

Minnesota

  • Minneapolis/St. Paul Star Tribune
  • Minneapolis Sunday Select
  • Willmar West Central Tribune
  • Marshall Independent

Illinois

  • Chicago Tribune
  • Chicago Hoy Fin De Semana

California

  • Sacarmento Bee
  • Modesto Bee
  • Sacramento Community Newspaper
  • Sacramento Yes
  • Stockton Record
  • Modesto Yes!
  • Chico Enterprise Record
  • Sacramento Bee/MVP
  • Redding Record Searchlight
  • Sonora Union-Democrat

Oregon

  • Portland Oregonian
  • Redmond Spokesman

Washington

  • Vancouver Columbian
  • Longview Daily News